

I really hope you enjoy this Rich & Aromatic Indian Chicken Korma Curry Cooked in Yogurt recipe. If you do, please let me know in the comments below. I LOVE reading your comments ❤
WHY YOU WILL LOVE THIS RECIPE
I’ve always known Chicken Korma had a special story behind it.
Every single time I had it as a child, and even today as an adult, with every bite, I just always knew it hid an interesting history.
And I didn’t learn of its history until pretty recently. I always knew its roots went back hundreds of years to the Mughal Era in India.
But the extent of its awesomeness? There’s an actual rumor that this dish was served to Shah Jahan and his guests to celebrate the completion of the Taj Mahal. The Taj Mahal!!! I never knew. Ever!
But now I know 💃🏻 and it’s just so interesting! You can read all about it in the next section because it’s AMAZING STUFF.
So yes…
Everyone, let me introduce you to Chicken Korma.
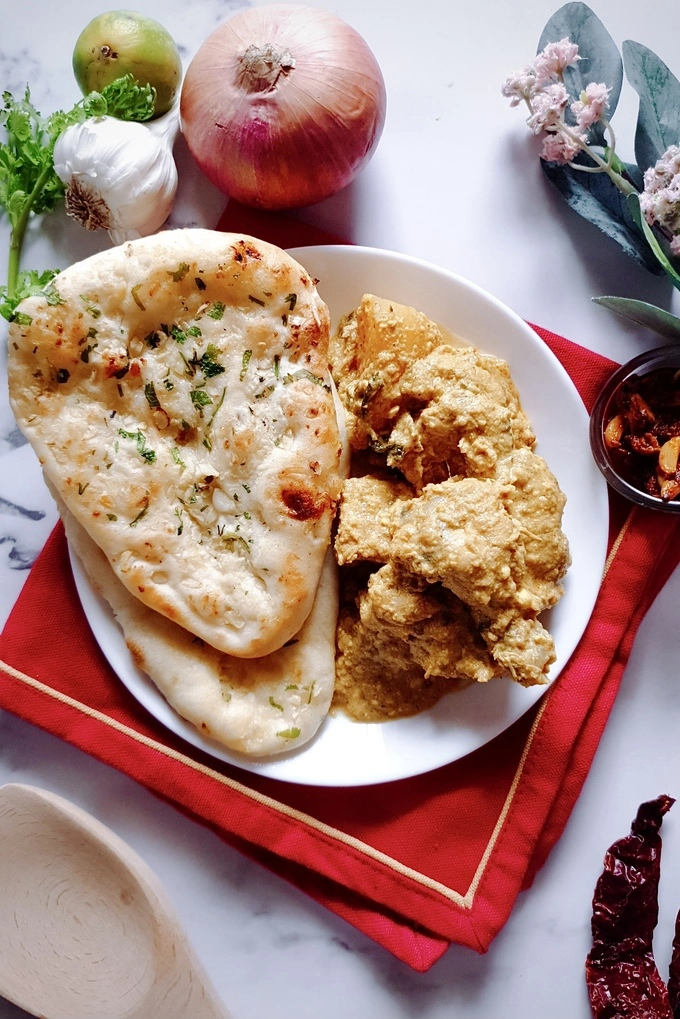
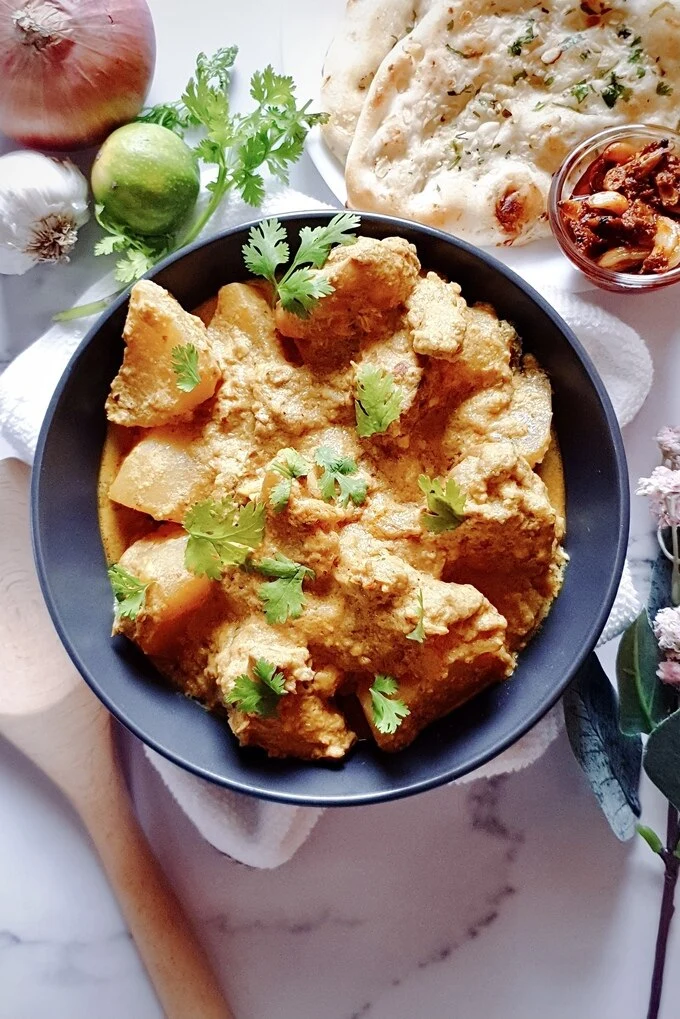
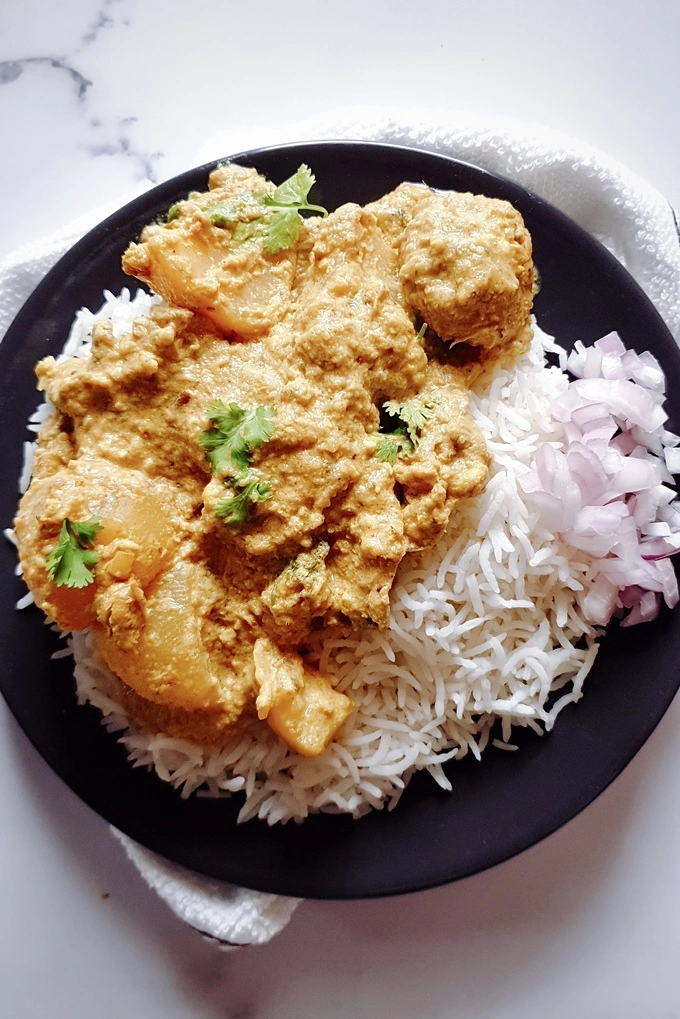
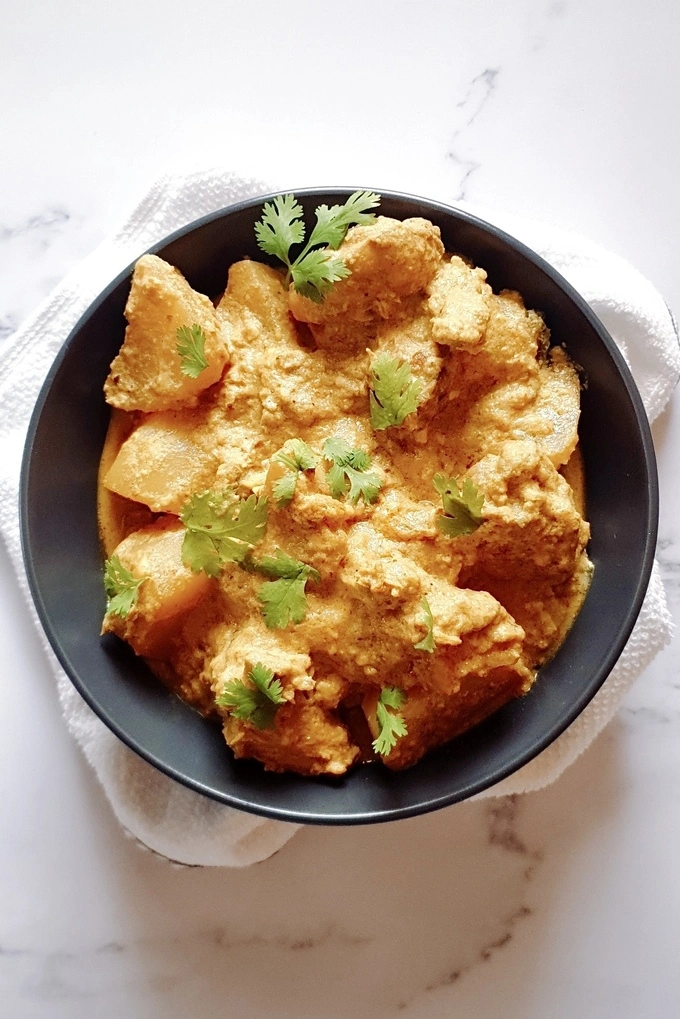
This is an incredible dish! Juicy pieces of chicken cooked in a delicious rich combination of browned onions, yogurt, cream and almonds. And some scrumptious potatoes too. You can just imagine how amazing it all turns out in the end!
With ingredients as amazing as these, it’s no surprise this dish is sooo good 💖.
This Indian chicken curry recipe is everything! It’s a rich, delicious curry with deep flavors of so many ingredients that work so well together. Nobody can say no to it (I haven’t met anyone yet who hasn’t gobbled it up in minutes!).
And hey, YOU. You who absolutely adore curry. I see you! Get ready to fall deeply in love. This may end up becoming the curry of your dreams. Not even kidding 😉!
A few more reasons why you’ll love this dish to bits and pieces…
- Korma is a dish that traditionally involves loads of steps to get right. Not here though! My mom has cooked this dish so many times over the years and she’s developed a few shortcuts that make this dish super easy to cook without sacrificing that delicious classic taste even a bit! She’s perfected it this way and shared it with me and I’m sharing it with you guys now!
- If you love curry, you’ll looove this dish so much! This is your chance to try a new type of curry apart from the usual ones (those are wonderful too!). Get ready to taste a whole new flavor and consistency! Rich, creamy, nutty, delicious… It’s all just so exciting ✨.
- If you’re new to eating Indian food and curry, THIS recipe is the right one to begin with. It’s delicately spiced and filled with rich subtle flavors that will open you up to a whole new world of exotic deliciousness. And oh my goodness it’ll fill your kitchen up with the most amazing aroma too!
- And if you’re new to cooking Indian food, don’t worry at all. I won’t call this a beginner curry because a few steps may be a little complex but it’s still not difficult to cook at all. Especially with my detailed steps and instructions as always, this delicious chicken korma recipe will be a breeze to make ❤.
- If you’re not into curry or know someone who isn’t fond of curry or Indian food, then this recipe is a wonderful beginning to Indian food. It’s creamy, filling and spiced in all the right ways. This korma curry will gently make its way to your tummy and heart ❤, making you fall so much in love!
- Most chicken korma recipes may have some ingredients that can be pretty difficult to find. To make it easy for you guys, I’ve tried and reduced the number of ingredients used here. I’ve also substituted some ingredients with easy-to-find ingredients instead. You can find the ingredients used in this recipe at your local Indian grocery store easy-peasy.
- This is just such an amazing meal. It’s good enough to have on your own with some warm rice on normal days because it’s so easy to make and it’s also extravagant and rich enough to serve for a party as a main dish like it was traditionally served (for celebrations) and is still served today as well.
- This entire dish is cooked in one pot and how amazing is that? You’ll have a delicious curry in no time and with as less dishes to wash as possible. Such a win-win!
- Is your diet preference vegetarian, dairy-free, gluten-free, nut-free or vegan? You can still make this delicious korma! Check out our Variations Section below to see how you can make this recipe according to your diet preference!
- Come on guys, it’s impossible not to love chicken korma! Rich, creamy delicious curry spread over some warm rice is the ultimate comfort food for those cold nights when you’re all warm and cozied up at home. This is the kind of food that will warm your tummy AND your soul.
How delicious is curry, right? Would you like to explore more such recipes? Check out our collection of absolutely lip-smacking Curries, Stovetop and Winter recipes.

WHAT IS RICH & AROMATIC INDIAN CHICKEN KORMA CURRY COOKED IN YOGURT?
Simply put, rich and aromatic Indian chicken korma curry cooked in yogurt is a delicately spiced, rich curry.
Juicy pieces of chicken are cooked in an absolutely delicious base of browned onions, ginger-garlic paste, yogurt, cream and almond paste along with some traditional Indian spices to give you an absolutely enchanting curry (yes, enchanting ✨!).
Now let’s explore its history as well as a bit of my history with it!
Korma comes from the Urdu word, qormā, which means “braise”. This is named after the cooking method used because the meat in korma is braised in yogurt.
There are various theories around this dish and where it originated from. I’ll not get into detail about everything that is said about it (because it can get pretty confusing!).
One of the most famous theories though is that this dish was probably adapted from the Persian dish, Khoresh.
Korma is a part of Mughlai cuisine. This is a cuisine that came into being in the 16th century when the Mughals ruled India.
It is said in some records that korma can even be traced right back to the 16th century itself!
Korma was cooked and developed in the royal kitchens. It was seen as a really special dish. There’s even a type of korma called Shahi (royal) Korma (that’s the one we are making here!).
Apparently, white korma was served to Emperor Shah Jahan when the construction of the Taj Mahal was completed. White korma was served to match the white marble of the Taj Mahal 🤍.
With time, the recipe developed further in different parts of India, Pakistan and Bangladesh. But it’s said that most of the ingredients and cooking methods have remained the same as they were hundreds of years ago.
A curry cooked using browned onion paste, yogurt, nuts and a different combination of spices usually qualifies as a korma.
Today, with a few variations in ingredients and spices, there are quite a few different types of korma such as the Shahi Korma, Hyderabadi Korma, Lucknowi Korma, Kashmiri Korma, Mughlai Korma, Navratan Korma, South Indian Kurma, Ceylonese Korma and quite a few more.
Chicken korma differs widely from region to region. Families have their own recipes too.
How amazing is it that this recipe originated during a completely different time hundreds of years ago and has traveled all over the Indian subcontinent and changed so much over the years AND now has come to this particular recipe! It’s an influence of a different time and so many different cultures and you’ll taste all of it with every bite!
I’ve been eating a slice of history? I never knew!
But that’s enough talking about its origins for now. Let’s move on to personal story time. That’s what The Buttery Fairytale is all about… Food memories ❤.
You can share your stories with this recipe in the comments below too whether this is the first time you’re trying this recipe or if you’ve already had it multiple times before, I would love to hear all about it!
The recipe here is my family’s version of chicken korma. It’s delicious, creamy, subtly spiced, nutty and so delicious!
My mom would make chicken korma on special occasions most of the time (I have all these fun party memories with korma!). She would sometimes make it on normal days for dinner too and I would be ecstatic every single time!
Zee and I went through a tiny korma crazy phase recently and mom started making it every time we visited her :’). Ah, we love korma so much.
My mom got this recipe from her mom (my grandmom) who also makes the most amazinggg korma in the whole world!
This is a family recipe and my mom came up with just a few shortcuts over the years to cook it faster. It’s still equally scrumptious though.
It feels absolutely amazing to share a recipe so close to my heart with you guys.
I’ve grown up eating this curry and it’s literally one of my most favorite dishes in the whole world.
I hope you enjoy it just as much and create the most amazing memories with it. You all are the absolute best.
Do YOU have a favorite curry? Do you have any special memories with it? Let me know all about it in the comments below. I would love to know ❤.
INGREDIENTS & SUBSTITUTIONS FOR RICH & AROMATIC INDIAN CHICKEN KORMA CURRY COOKED IN YOGURT
For exact ingredient measurements, please scroll down to the Recipe Card.

- Oil- A neutral cooking oil will be best here.
- Onions- Onions form an incredibly important base traditionally in this curry. The onions need to be blended into a paste. You can do this by blending them in a food processor. Make sure the paste is smooth and there are no small onion bits in it. You can use any type of onion here!
- Ginger-garlic paste- This is a classic ingredient used in Indian dishes and oh my goodness, I love its delish ginger-garlic smell so much ❤! You can buy this paste from any Indian grocery store or make it at home (like I do!). Make this paste in a blender or food processor by adding in about 5 to 6 medium-sized cloves of peeled garlic and 2 inches of peeled ginger with about 1/4th teaspoon of water. Blend until it’s nice and pasty. A few small bits and pieces of garlic and ginger in the paste are okay and add more flavor. It doesn’t have to be completely smooth. If you want a smoother curry though, make sure you blend until the paste has no bits and pieces of ginger and garlic at all.
- Chicken– Korma is a curry but the chicken also stews in that lovely nutty creamy yogurty base and lends its amazing flavors to the dish. That’s exactly why we are using bone-in chicken here! You can use boneless chicken breasts and thighs too. I love this dish with boneless breasts ❤.
- Potatoes- Oh man potatoes take this dish to a whole other level! And the taste those potatoes get in them after they’re cooked in the browned onion paste, yogurt, cream… almond paste… chicken flavors… Mmm! I’ve used russet potatoes here.
- Salt- Just a pinch of salt will bring out and enhance the flavors of our chicken korma curry!
- Kashmiri red chili powder- This delish chili powder doesn’t add much heat to the curry and instead, is added more for that amazing very slight smoky taste. I’ve used a brand called Everest here, and the name of the product is Everest Kashmirilal. There may be other brands selling this spice and you can use any of them too. Please try and use this spice ONLY but if you really can’t find it, a substitute may be either smoked or regular paprika. You can add in just a little cayenne pepper to the paprika for a little spice, if you prefer.
- Turmeric powder- A little turmeric powder here will give our chicken korma a pale yellow pretty color and a tiny deep earthy flavor.
- Almond paste– Oooh my favorite part of this recipe! Almond paste is another classic ingredient needed to make a proper, authentic korma. To make a paste out of your almonds, grind them with just a little water into a paste. Make sure you grind your almonds into a really smooth paste with no bits and pieces of almonds remaining. You can substitute with cashew nuts here.
- Light cream or heavy cream- This dish is supposed to be nice and rich. We don’t want it to be too creamy though so we add in very little cream to make the chicken korma rich, but not too rich and heavy. We’ve used light cream here with a fat percentage of 25%. You can use heavy cream too. You can also use cream with a lower fat percentage or even half and half if you prefer. Just keep a check on the amount of water you’re adding so the curry doesn’t get too watery in case you’re using half and half.
- Plain yogurt- Another incredibly important ingredient necessary to make a korma. Please use plain yogurt here and make sure you whisk it. You can use Greek yogurt too but that may curdle in the curry. The taste of the dish won’t change if your yogurt curdles but the look of the dish will change.
- Garam masala- This exotic spice mix contains some incredibly essential spices. It adds that finishing touch to make our chicken korma absolutely divine! This can easily be found at your local Indian grocery store. You can make it at home too!
- Green chili peppers- That slight taste of green chili peppers in chicken korma is sooo goooooood! Added towards the end, green chili peppers just do a little something to korma and work so well with the already rich curry. I’m not into spicy food at all, so I slice the green chili peppers lengthwise in half and remove their seeds. Doing this gives us that slight chili flavor without too much spice. If you have kids, you can skip out on this ingredient completely or remove the green chili peppers before serving the chicken korma curry to them. I suggest against this though because green chili peppers really don’t make the dish spicy and add a fantastic subtle flavor to the chicken korma curry.
- Fresh mint leaves and cilantro- Two wonderful ingredients that give a fresh touch to our rich korma curry. Either or both of these are almost always added to Indian curry dishes towards the end as a finishing touch. That’s how awesome they are!
- Lemon juice- Squeezed in right before serving the chicken korma curry, lemon juice adds a very slight tang and works really well with the yogurt base of this curry. Don’t skip out on this just because it’s towards the end. It’s equally important ❤.
- Raw onions- Onions taste wonderful alongside some chicken korma! Slice your onions into rings or chop them up. Take small bites of the onion in between bites of the curry or just include them in those curry bites… Ah. Don’t skip out on this, you guys!
Once again, for exact ingredient measurements, please scroll down to the Recipe Card.
How delicious is curry, right? Would you like to explore more such recipes? Check out our collection of absolutely lip-smacking Chicken & Meat, Stovetop and Party/Special Day recipes.
RECIPE & DIET VARIATIONS YOU CAN TRY
Curries are an amazing dish to test out different variations with because they’re so forgiving and easy to work with (wait, not all curries, most of them, and this is one of them!).
And hey, once you like how a curry tastes, you can try everything under the sun to see what else can go well with it!
Let’s explore a few variations you can try with this chicken korma recipe. So exciting!
- You can use boneless breast or thigh meat. I LOVE this dish with boneless breast meat. It makes it so much easier to eat too! Especially if you’re planning on having this dish the next day for lunch at work.
- You can also try making this rich and aromatic Indian chicken korma curry cooked in yogurt using a different meat. It’s more commonly made with mutton. You can also try making shrimp korma, fish korma, lamb korma or even beef korma. Just adjust the cooking time according to the meat you use.
- Also, try adding in some different vegetables along with the potato! Almost every veggie goes well with this chicken korma curry. You can try adding in cauliflower, green beans, peas, carrots or any other veggie that happens to be in season… Just go ahead and experiment and find what you feel will taste best!
- Or hey, just skip out on the potatoes or any other vegetable for that matter for a super meaty korma if that’s something you prefer! I have my chicken korma that way sometimes. It’s only chicken chicken chicken ❤!
- There are two different kinds of pastes you can make out of your almonds. You can make a smooth paste or a chunky paste or even something in the middle– a little smooth a little chunky. The smoother your paste is, the smoother your curry will be. I prefer both. Just go ahead with what you think you will like best! When you’re cooking this dish for the first time, I suggest you go completely smooth with your almond paste.
- You can also try using a different nut. Chicken korma tastes wonderful with cashew nuts too! Just make a paste with cashew nuts instead of almonds and cook the dish the same way according to the instructions given in this recipe. You can also experiment and make an almond-cashew nut paste for even more richness!
- We’ve used light cream in this recipe because chicken korma needs to be rich but not heavy and super creamy. But hey, you can use heavy cream if you prefer to have an even creamier and richer chicken korma curry.
- You can also go for a lighter cream or even half and half. Just keep a check on the amount of water you’re adding so the curry doesn’t get too watery in case you’re using half and half.
- For an even deeper chickeny taste, you can use chicken broth instead of water. I personally do not like adding in chicken broth because its flavors can be a little dominating. I prefer not letting any other flavor dominate over the gentle creamy, nutty, yogurty-ness of this delicious mildly spiced curry. But you can try it out and see if you prefer it!
- You may prefer a thinner curry. For a thinner version of this chicken korma curry, add in more water if you prefer in Step 8 and make sure you season accordingly with salt. Read more on how to go about this in the same step.
- You may also prefer a drier version of curry. For a drier version of this chicken korma curry, make sure you let more of the curry evaporate in Step 8. Read more on how to go about this in the same step.
- This dish is not spicy at all. I’ve asked you guys to slice the green chili peppers lengthwise in half and discard their seeds to reduce as much heat as possible and just get that slight flavor from the green chili pepper. As an extra added measure, go ahead and remove the green chili peppers from the chicken korma before serving the dish. Especially even more so if you have kids. If you are still incredibly against spiciness though, you can skip out on the green chili peppers. I suggest against this though because deseeded green chili peppers really don’t make the dish spicy and add a fantastic subtle flavor to the chicken korma curry. I don’t want you to miss out on that!
- Traditionally and most commonly too, chicken korma is not supposed to be spicy. If YOU prefer spicy food though, make sure you leave the seeds in when you slice your green chili peppers lengthwise. For an even spicier chicken korma, chop or mince your green chili peppers. This will make the dish reallyyy spicy though so be careful.
- This recipe is Chicken Shahi Korma (a royal version of the normal korma recipe out there) as we’ve mentioned before. To make it Shahi-er (royal-er), you can add in some chunks of cottage cheese in Step 8 once you lift the lid off the pan. Follow the rest of the steps as given but try and make sure the cottage cheese is cooked for at least 12 to 15 minutes before serving the korma so the cottage cheese is cooked through and is nice and cheesy!
- There’s a different variation of this dish you can try too. You can add in some coconut milk instead of light cream/heavy cream. You can also add coconut paste or shredded coconut instead of almond paste. These two changes will make this a delicious coconut chicken korma curry
- Also, this dish is usually a very pretty pale yellow color and that’s what I prefer too. If you want a darker yellow chicken korma curry though, go ahead and add in a little more turmeric. Not too much though because it may alter the taste a little. If you want a redder chicken korma curry, add more Kashmiri chili powder. Once again, don’t add too much because it may alter the taste of your curry a little.
Continue reading if you would like to read about vegetarian, dairy-free, gluten-free, nut-free or vegan adaptations of this recipe.
Note- If you think you have an ingredient that you feel is suitable as a substitute for a certain ingredient in this recipe, according to your dietary preference, you can use it and let us know how it works as a substitute in the comments below. I’ll then add it in as an adaptation suggestion here. This will help so many others with the same diet preference as yours.
Vegetarian Adaptation:
Vegetarian korma can be made in quite a few delicious ways. To make rich and aromatic Indian korma curry cooked in yogurt…
- You can use cottage cheese instead of chicken here. Cut them into nice fat cubes for a delicious cheesy korma treat!
- You can also use any vegetable of your choice like maybe cauliflower and make some warm comforting cauliflower korma. You can also use a combination of vegetables and make a mixed vegetable korma curry too! You can also use any veggie that’s in season.
- Make sure the dairy products you use in this recipe such as light cream/heavy cream and plain yogurt do not contain gelatin.
Please always read through the ingredient list of all the other ingredients in the recipe to make sure they are vegetarian.
Dairy-Free Adaptation:
To make some absolutely amazing dairy-free rich and aromatic Indian chicken korma curry…
- Coconut cream or cashew cream can be used here instead of light cream/heavy cream for added richness and depth.
- Instead of plain yogurt, you can use some delish coconut milk. The chicken will taste absolutely amazing cooked in that creamy coconut milk. I’ve heard cashew yogurt and coconut yogurt work well here too!
Hey, if you feel the light cream/heavy cream and plain yogurt can be substituted for any other ingredient here, let us know! We’ll add it in if it worked for you. It’ll help so many other people with the same diet preference as yours!
Please read through the ingredient list of all the other ingredients in the recipe to make sure they are dairy-free. That’s because hidden dairy may be present in some ingredients.
Gluten-Free Adaptation:
This is a gluten-free chicken korma curry. But hey, there are a few things to keep in mind.
To make gluten-free rich and aromatic Indian chicken korma curry cooked in yogurt…
- Kashmiri red chili powder, turmeric and garam masala are gluten-free but ground spices may sometimes contain gluten. This is because they either get contaminated in the factory during production or because they have flour added to them. Please make sure the ground spices you use are gluten-free.
- Many dairy products in their natural form are gluten-free BUT some plain yogurts may have additives that contain gluten. Please go through the ingredient list on the food label of the plain yogurt you buy to make sure no additional ingredients that may contain gluten are added to it.
- The same goes for light cream/heavy cream too. Please go through the ingredient list on the food label of the cream you buy to make sure no additional ingredients that may potentially contain gluten are added to it.
- Please also make sure the cooking oil you use does not contain any additives that contain gluten.
Please always read through the ingredient list of all the given ingredients in the recipe to make sure they are gluten-free. This is because hidden gluten may be present in some ingredients.
Nut-Free Adaptation:
To make scrumptious nut-free rich and aromatic Indian chicken korma curry cooked in yogurt…
- Unfortunately, some spices use nuts as a filler in their powders. Please make sure you use spices that do not contain any nuts.
- Some people who are allergic to tree nuts like almonds, cashews and walnuts, may be allergic to coconut too. If you are not allergic to coconut though, you can use shredded coconut or coconut paste in this recipe instead of almond paste. If you are allergic to coconuts as well, go ahead and skip out on the nut paste as a whole.
- Please also make sure the cooking oil you use does not contain nuts or is not derived from any nuts.
As always, please make sure you thoroughly read through the ingredient list of all the ingredients that have been mentioned in this recipe. Hidden nuts may be present in some ingredients.
Vegan Adaptation:
Vegan korma can be made easily with just a few tweaks! To make vegan rich and aromatic Indian korma curry…
- You can use some firm or extra firm tofu instead of chicken here. Just go ahead and cut your tofu into nice fat chunks to absorb all that korma goodness!
- You can also use any vegetable of your choice like maybe cauliflower and make some warm comforting cauliflower korma. You can also use a combination of vegetables and make a mixed vegetable korma curry too! You can use any other veggie that’s in season as well.
- Coconut cream or cashew cream can be used here instead of light cream/heavy cream for added richness and depth.
- Instead of plain yogurt, you can use some delish coconut milk. I’ve heard cashew yogurt and coconut yogurt work well here too!
- Make sure you use lemons that haven’t been waxed. Waxed lemons are not vegan because the wax on these lemons contains shellac, which is derived from the female lac bug.
And as always, please read through the ingredient list of all the given ingredients in the recipe to make sure everything is vegan.
Disclaimer– I’ve done research to make things easier for you guys, but please make sure you do your own research too if you are allergic to something or have a specific diet preference. The suggestions given above for dietary preferences are only suggestions and NOT medical advice. These are suggestions given just after a little research on the said dietary preferences. We are NOT trained medical professionals or nutritionists. You are responsible for yourself, so please ask your physician if you have any questions and make sure you always completely read through the ingredient list of any ingredients you use.
HOW TO MAKE RICH & AROMATIC INDIAN CHICKEN KORMA CURRY COOKED IN YOGURT [Step-by-Step Instructions With Photos]
For exact ingredient measurements and instructions without photos, please scroll down to the Recipe Card.
Please keep in mind that I go into lots of detail in all my recipes so you get to know all the super important tips and tricks when it comes to making a particular recipe. I always want you to make the BEST of whatever you’re cooking ❤.
STEP 1: GET ALL YOUR CHICKEN KORMA INGREDIENTS READY
This is a curry and curries usually have loads of ingredients.
Our chicken korma curry doesn’t have lots of ingredients BUT some prep is necessary. You don’t want to be running around making the almond paste right at that moment 😉!
So make sure you get all your ingredients ready.
Also, go ahead and make your onion paste, ginger-garlic paste and almond paste.
Keeping all the ingredients ready will help you add each ingredient on time. You won’t feel flustered while cooking either. It’s the best thing to do, really.
Now that that’s out of the way… let’s cook 💖!
STEP 2: COOK THE ONION PASTE
I’ve used a kadai here. It can be described as the Indian version of a wok.
You can use a heavy-bottomed pan or Dutch oven too.
Make sure the cooking pan you’re using has a lid though.
Anyway…
Onions are super important in curries and this chicken korma curry is no exception!
Especially even more so in chicken korma because one of the most important things in a korma is the browned onion paste. That’s one of the things that gives it its characteristic taste!
So let’s go ahead and brown some onion paste!
Pour in the oil in your cooking pan and heat it over medium-low heat.
Once the oil is heated through in a few minutes, add your onion paste to it.
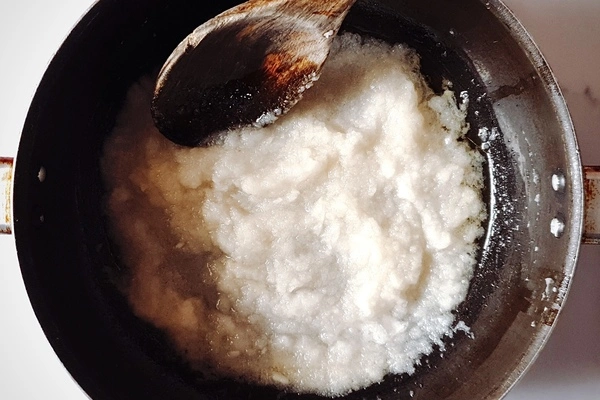
Now, over low to medium-low heat, cook your onion paste until it turns a nice deep golden brown as you can see in the picture below.
This may take some time, about 20 to 25 minutes. I know it sounds like a lot but this is an incredibly important step in this dish so patience is key here ❤.
Don’t increase your heat to high to speed up the process because then only a few parts of the onion paste may turn brown and the rest of it may still stay raw. The onion paste may also burn. It literally takes a few seconds for onions to go from slightly browned to burnt.
Please keep a constant check on the onion paste.
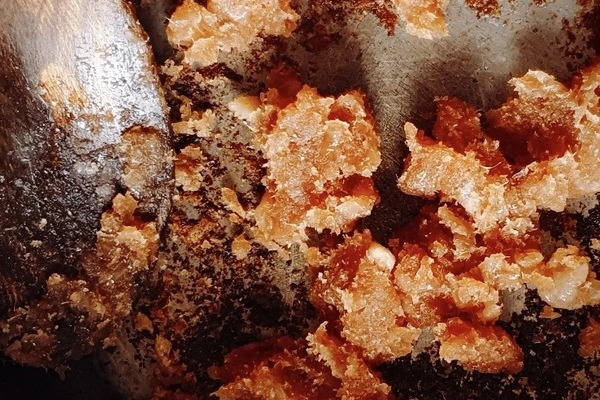
As the onion paste starts to brown, it may stick a little to the bottom of your pan but that’s okay and it will come off during the rest of the cooking process.
You may also smell that characteristic aroma of delicious browned onions once the paste is browned well. This is a sign that it’s almost done.
Please keep in mind that the cooking time here will depend on the amount of onion paste you’re using, the cooking utensil you’re using, the size of your cooking utensil and your stove, so please keep a constant check on your onion paste while cooking it. Don’t let it brown too much or it may burn.
STEP 3: ADD THE GINGER-GARLIC PASTE
Once your onion paste turns that amazing brown color, add in the ginger-garlic paste.
Sauté for about 2 minutes until it mixes really well with the browned onion paste.
STEP 4: COOK THE CHICKEN AND POTATOES
Once you’re done sautéing the ginger-garlic paste with that beautifully browned onion paste, add the Kashmiri chili powder, turmeric powder, potatoes, chicken and salt to the onion and ginger-garlic mixture.
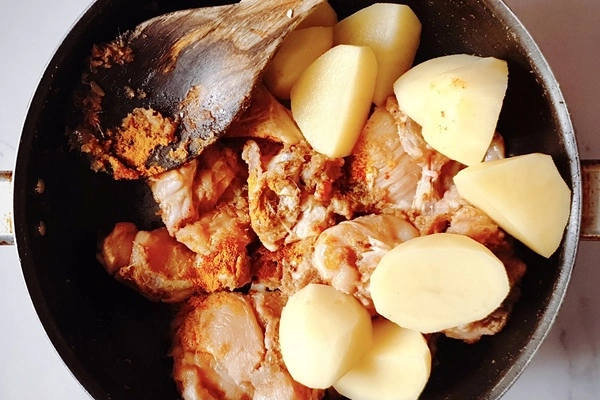
Toss the chicken and potatoes with all the spices and the onion ginger-garlic mixture.
Make sure the chicken and potatoes are coated really well with all those onions, ginger, garlic and spices.
Here’s the important part. You need to cook the chicken really well with all these spices. This is an essential process in cooking Indian food called bhunna in Hindi which basically means to “roast”.
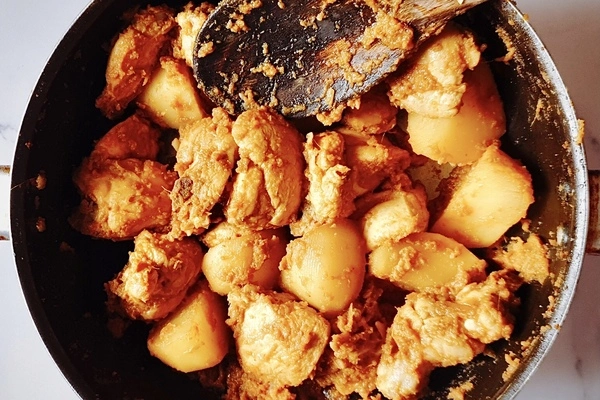
Keep mixing and cooking the chicken with all the other ingredients in the cooking pan.
Let all the flavors work with each other.
Go ahead and breathe in all those amazing gingery garlicky oniony chickeny aromas in the process ✨!
You need to do this for about 7 to 8 minutes.
STEP 5: ADD THE ALMOND PASTE
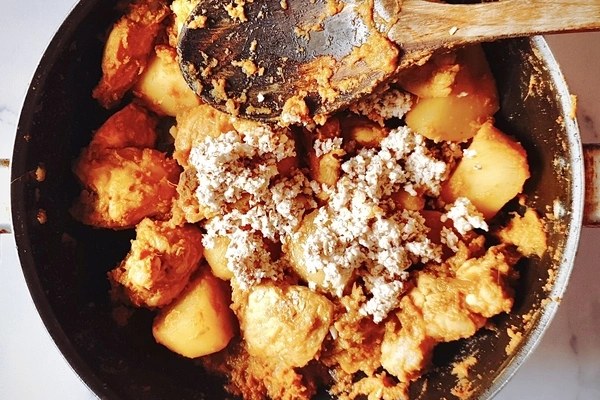
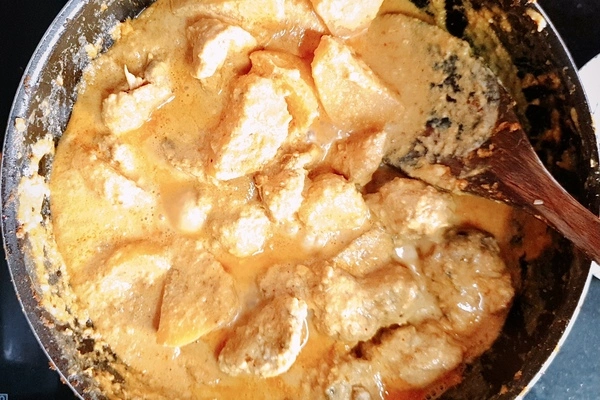
Once the chicken has been mixed and cooked with all the other ingredients in the pan for a good 7 to 8 minutes, go ahead and add the almond paste to the pan.
Mix the almond paste in really well with the chicken and other ingredients.
Sauté for a good 5 to 6 minutes.
When you’re doing this, you’re cooking that almond paste and allowing it to mix in with all the other ingredients and lend its almond-ness to them.
All these processes are incredibly important for our dish so just enjoy the process while you’re doing the entire mix-mixing!
These small steps are pretty important and they are what turn a normal ok-tasting curry into an absolutely amazing delicious curry!
STEP 6: ADD THE CREAM AND PLAIN YOGURT
There are some really important tips in this step so please keep reading before adding the cream and plain yogurt to the pan.
If you can, please move your pan away from the heat for this step. Set the pan aside for a minute or two and then follow the instructions below.
If you really can’t move the pan away from the heat, then reduce the heat to low.
Now…
Follow the steps below to prevent your plain yogurt from curdling in the curry. These steps can be followed if you’re afraid of your cream curdling too:
- Use full-fat plain yogurt if you can. That’s because it has lower chances of curdling.
- Please wait for the plain yogurt to come to room temperature. Make sure it’s not really really cold and fresh out of the fridge when it’s time to add it to the pan.
- Whisk the yogurt really well to reduce the chances of it curdling when it’s added to the pan.
- Take a teaspoon of the hot onion ginger-garlic mixture from the pan. Now, slowly add it to the plain yogurt while stirring gently simultaneously and mix it really well to get the yogurt to that temperature. Add in about 4 to 5 more teaspoons of the curry if you can and stir it into the yogurt.
- Always reduce the heat completely to low or move your pan away from the heat altogether if you can before adding the plain yogurt to the pan. This reduces the temperature of the curry which then in turn reduces the likelihood of the plain yogurt curdling in the curry.
- If you are afraid of the cream curdling in the curry, just go ahead and add it to the plain yogurt and whisk them together, then follow the above tips to reduce the chances of the cream and plain yogurt curdling.
- You can also add a teaspoon of cornstarch to the plain yogurt but I don’t prefer doing this. You can keep this as a last resort in case your plain yogurt curdles every single time even after following all the tips above.
You can follow either or all of the above tips to drastically reduce the chances of your plain yogurt curdling in the curry once it’s added to the pan.
It’s always best to follow all the tips to prevent curdling from happening as much as possible (except for the last cornstarch tip)!
You can follow the tips above for the light cream/heavy cream too.
You can follow these tips every single time you use plain yogurt in a curry to prevent it from curdling in it.
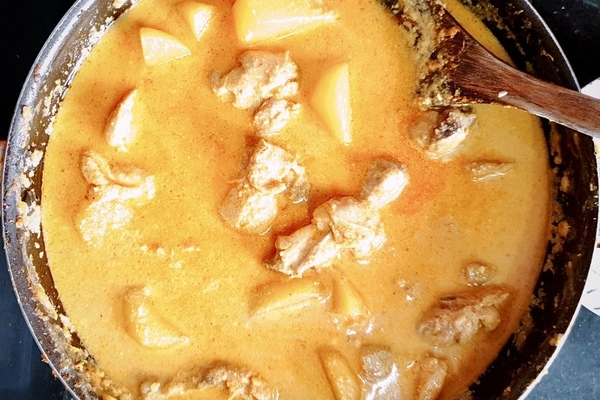
Once you’ve followed the tips above, go ahead and add the plain yogurt and light cream/heavy cream to the pan!
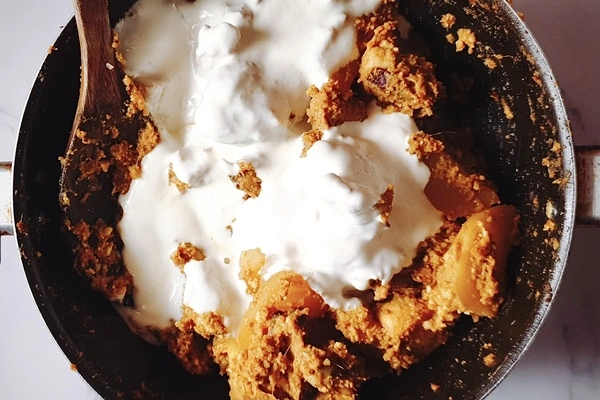
That sudden amazing richness and creaminess taking over everything in the pan once you add the cream and plain yogurt is so beautiful to watch happening!
Now, gently mix the chicken, potatoes and everything else in the pan together with the cream and plain yogurt.
Increase the heat to medium-low now and cook for 3 to 4 minutes until everything comes to a light simmer in the pan.
STEP 7: COVER AND COOK
Once you’re done cooking everything in the pan for 3 to 4 minutes until it all comes to a light simmer, add in 1 +1/4th cups or 300 ml of water to the cooking pan.
Gently stir and mix everything together.
Now, make sure you submerge your potatoes completely in the water as much as you can.
Cover the pan and cook your curry on low to medium-low heat for about 28 to 30 minutes.
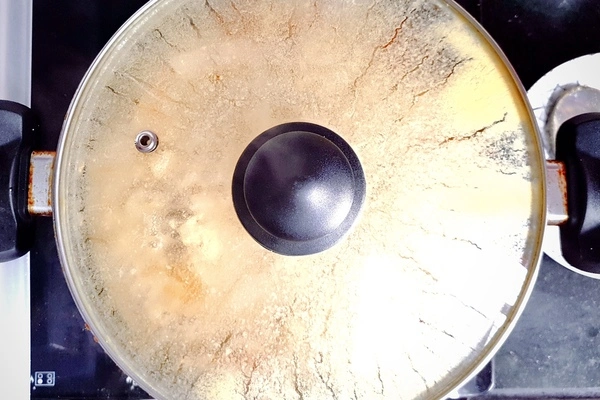
Once again, the cooking time will depend on the number of people you’re cooking for (in case you’re cooking for more servings than the recipe originally has been made for i.e. 4 servings), the cooking utensil you’re using, the size of your cooking utensil and your stove.
Please keep checking on your curry periodically while it cooks, without lifting the lid too many times. Make sure it doesn’t dry out too much.
STEP 8: CHECK HOW THE CURRY’S DOING 😉
Once those 30 minutes are up (I hope you guys were checking on your curry from time to time like I asked you to above, we don’t want any strange-looking curry surprises!), gently lift the lid up and see how your curry looks.
By this point, the oil may have risen to the top of your curry. That’s good. It means it’s cooked through so YAY 💃🏻!
Some important points here…
Once you lift your lid up, the first thing I want you to see is how your potatoes are doing.
Gently insert a fork into one of the potato cubes. If this happens without any difficulty, your potatoes are ready.
If there is some resistance and your potatoes are still a little tough, cover and cook for another 5 minutes.
Now, coming to the curry. You may notice your curry is either runny, too thick or just right.
When it comes to me, my tried and tested way and preferred consistency comes in usually when I…
Evaporate the curry on high heat for another 3 to 4 minutes without the lid on.
And then reduce the heat to low, taste the curry and add in some more salt if I prefer.
It may still look a little thin but the curry will continue to evaporate as we cook it in the next step too. I suggest you follow this method, especially if this is the first time you’re cooking this dish.
That’s because it’s a safe bet and it’ll help you understand what your preferred consistency is the next time you cook this dish.
But you can also see what you relate to most from the following:
- If you feel the consistency of your curry is just right, gently taste your curry (be careful ❤) and if you feel it needs more salt, add some in according to your preference and then jump to the next step.
- If you feel your curry is too runny, raise the heat to high and let it evaporate to being just a little thinner than your desired level. Please be careful and don’t evaporate too much. That’s because the curry will continue to evaporate as it cooks in the next step and also as it cools down once you’re done cooking it. Then, reduce the heat to low, taste the curry, adjust the salt if you prefer and move to the next step.
- If you would like a thinner curry, just go ahead and add a little more water than how thin you prefer your curry to be. Mix it in well. Increase the heat to high and bring your curry to a boil. Let it boil for a minute or two. Then, reduce the heat to low once again and let it simmer for at least a minute or two. Let it simmer until it reaches a stage that is just a little thinner than your desired consistency. That’s because the curry will keep evaporating in the next step and will thicken as it cools down once you serve it. Give it a taste. It may need a little more salt because you’ve added more water to it. If it does, add some salt according to your taste and move to the next step.
STEP 9: SOME FINISHING TOUCHES!
Add in the garam masala powder, green chili peppers, cilantro and mint leaves to the curry.
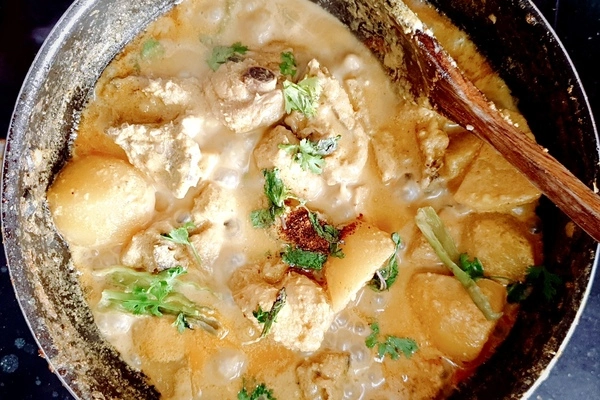
Cover your pan with the lid once again and let the curry cook for another 2 minutes on low heat.
Once 2 minutes are up, lift the lid, switch off the heat and add in the lemon juice.
Serve this dish immediately.
If you are using an electric cooktop and not serving this dish immediately, move your cooking pan away from it and place it somewhere else because the electric cooktop may still be hot even after switching the heat off and the korma may continue to cook and thicken up.
And that’s that! Your incredibly delicious, rich and aromatic Indian chicken korma curry cooked in yogurt is ready!
And YOU made this happen. All on your own. You should be incredibly proud of yourself 💖.
Check out the Serving Suggestions below to find your preferred way of eating this curry and hey, don’t forget to eat using your bare hands, the traditional way!
Hey you, I really hope you love this rich and aromatic Indian chicken korma curry cooked in yogurt recipe as much as I do!
If you do, I would appreciate a star rating SO much (you can rate this recipe right below or from the Recipe Card 💖).
Also, if you have any questions about this recipe, make sure to check out our FAQs section below to maybe find your answer there, or leave a comment and I will try to get back to you as soon as possible, I promise 😊.
TIPS TO MAKE THE BEST RICH & AROMATIC INDIAN CHICKEN KORMA CURRY COOKED IN YOGURT EVERY SINGLE TIME
Now that you’ve gone through the instructions, you may have noticed how much fun this recipe is to cook!
All those different stages, the aromas, the stirring and sautéing, the sizzling, the mixing together of ingredients… It’s amazing 🤩.
I looooooove recipes like this one. They’re simple and so difficult to mess up. Recipes like this korma curry recipe are an absolute pleasure to cook!
But hey, here are some tips to make sure you come out with the best chicken korma curry every single time you cook it because this is the best chicken korma recipe ever and is so easy and forgiving!
The following tips are those that can change an average chicken curry recipe into an awesomesauce one!
You may have also read some of these tips in the instructions and they’re just being reiterated here because that’s how important they are.
- Always make sure your spice powders are fresh. Spice powders don’t go bad but lose their potency over time!
- Please keep all the ingredients ready before cooking. It’s super important to do this before cooking any recipe out there and especially even more so when cooking a curry. That’s because there may be ingredients to add in just at the right time and if you don’t have all the ingredients ready, you may get overwhelmed while cooking.
- This dish should not be cooked in a hurry. Please make sure you have enough time on your hands when you decide to make this chicken korma recipe. It doesn’t take long to cook and this is such an easy chicken korma recipe BUT you need to dedicate the given time to each step as given in the instructions. That’s what will give you the best curry ever! Please don’t jump through any step because these small things make a hugeee difference.
- The onions need to be ground to a really fine paste. In an authentic chicken korma recipe, you are not supposed to have long slices of onions in the curry. If you choose to not grind your onions to a paste, the curry will still taste good but it won’t be authentic chicken korma and it’ll lack that yum taste that comes from browned onion paste.
- Please make sure you brown the onion paste really well. That fried browned onion taste is incredibly delicious ❤! Each step while making this curry is really important and will give you the most perfect tasting, best chicken korma every single time.
- If you are making your ginger-garlic paste at home, always make sure there’s more garlic used in the paste than ginger. We don’t want ginger dominating the taste of your ginger-garlic paste. The perfect ginger-garlic paste is where garlic dominates the taste and ginger is in the background, chilling. Unless you prefer more of ginger, of course!
- If you want a darker yellow chicken korma, add a little more turmeric. Don’t add too much though because it will alter the taste of the curry. And if you want a redder chicken korma, add more Kashmiri chili powder. Once again, don’t add too much because it will alter the taste of your curry.
- Follow the steps below to greatly reduce the chances of your plain yogurt curdling in your curry. These steps can be followed if you’re afraid of your light cream/heavy cream curdling too:
- Use full-fat plain yogurt if you can. That’s because it has lower chances of curdling.
- Please wait for the plain yogurt to come to room temperature. Make sure it’s not really really cold and fresh out of the fridge when it’s time to add it to the pan.
- Whisk the yogurt really well to reduce the chances of it curdling when it’s added to the pan.
- While making this recipe, take a teaspoon of the hot onion ginger-garlic mixture from the pan. Then, slowly add it to the plain yogurt while stirring gently simultaneously and mix it really well to get the yogurt to a warmer temperature. Add in about 4 to 5 more teaspoons of the curry if you can and stir it into the yogurt.
- Always reduce the heat completely to low or move your pan away from the heat altogether if you can. This reduces the temperature of the curry which then in turn reduces the likelihood of the plain yogurt curdling in the curry.
- You can also add a teaspoon of cornstarch to the yogurt. I don’t prefer doing this and I suggest you keep it as a last resort.
- If you are afraid of the cream curdling in the curry, just go ahead and add it to the plain yogurt and whisk them together, then follow the above tips to reduce the chances of the cream and plain yogurt curdling.
- Korma curry thickens up as it cools down. Please keep this in mind when you are choosing your desired consistency because the korma will always get thicker than the consistency you prefer.
- If you prefer a thinner curry, add in more water in Step 8 and make sure you season accordingly with salt. Try and add warm water if you can. Read more on how to go about this in Step 8.
- You may also prefer a drier version of the chicken korma curry. For a drier curry, make sure you let more of the curry evaporate in Step 8. Read more about how to go about this in Step 8.
- As I mentioned in the instructions, bhunna (roasting) the chicken is really important. Please don’t skip out on this step (or any other step, really). These small tips have been going on for generations and for good reason because they make all the difference ❤!
- Please be careful when slicing your green chili peppers! Try and get it done and over with as quickly as possible. These chilies can make your skin and eyes burn if you don’t thoroughly wash your hands after you’re done slicing them. Green chili peppers are not fun when they burn but *sigh* they add such a good taste to our korma curry. If your hands happen to burn after slicing the green chili peppers, you can run them under some cold water or soothe them in some cold yogurt. This is not so common though and has happened to me just once ❤.
- If you are sensitive to heat, slice your green chilies lengthwise into half and deseed them as I ask you to do in this recipe. You can also choose to remove the green chili peppers before serving the chicken korma. You can completely skip out on it if you’re incredibly sensitive to spicy food or have kids but trust me, the curry isn’t spicy at all if you follow what I ask you to do with the green chili peppers!
- If you like spicy food though, you can skip out on removing the seeds from your green chili peppers after slicing them lengthwise in half. You can also mince your green chili peppers or finely chop them for some extra heat. This can get really spicy though so be careful!
- Serve this dish immediately. If you are using an electric cooktop and not serving this dish immediately, move your cooking pan away from it and place it somewhere else because the electric cooktop may still be hot even after switching the heat off and the korma may continue to cook and thicken up.
SERVING SUGGESTIONS FOR RICH & AROMATIC INDIAN CHICKEN KORMA CURRY COOKED IN YOGURT
Curry is ahhhmazing!!! And what makes it even more awesomesauce is how wonderful it tastes when it’s paired with something else ❤.
The right partner takes curry to crazy tasty! Here are a few friends you can pair your chicken korma curry with. Enjoy!
- You can pour your chicken korma curry over some warm steamed Basmati rice. It’s a classic way to have curry and almost every curry out there in the world goes well with good ol’ steamed rice. That creamy delish chicken korma gravy with those flavorful potatoes will taste glorious mixed with some steamed warm rice. You can use any other rice you prefer too but long-grain rice works best here with this delicious chicken curry.
- You can also use another grain you prefer. Go ahead and try serving your chicken korma with couscous, brown rice, quinoa… or any other grain you like!
- You can pour some hot delicious chicken korma over some cauliflower rice and try it that way too!
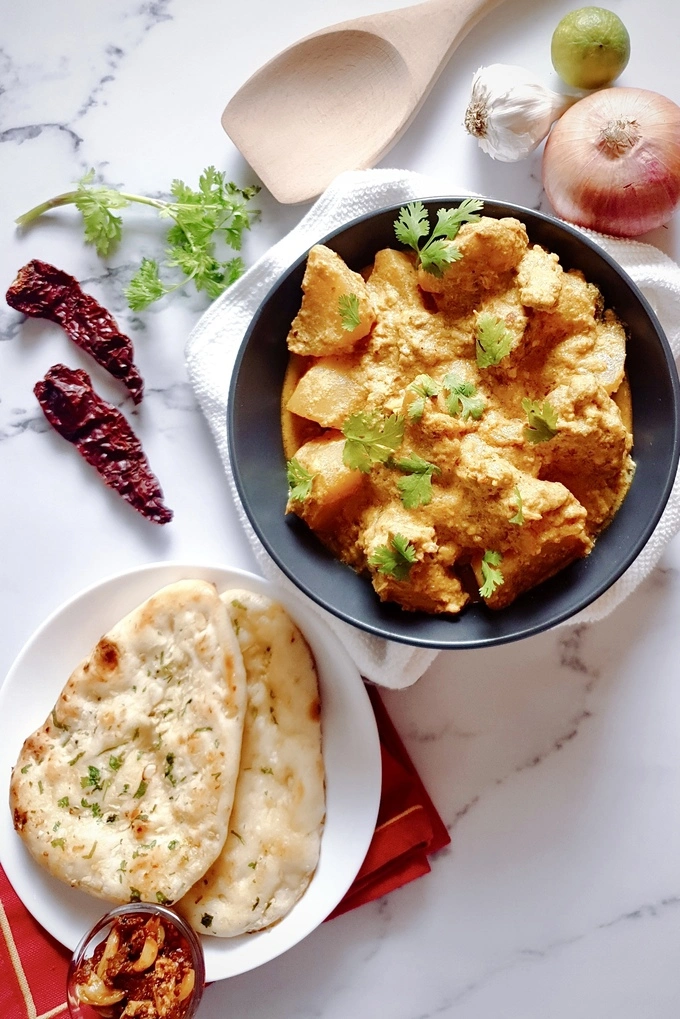
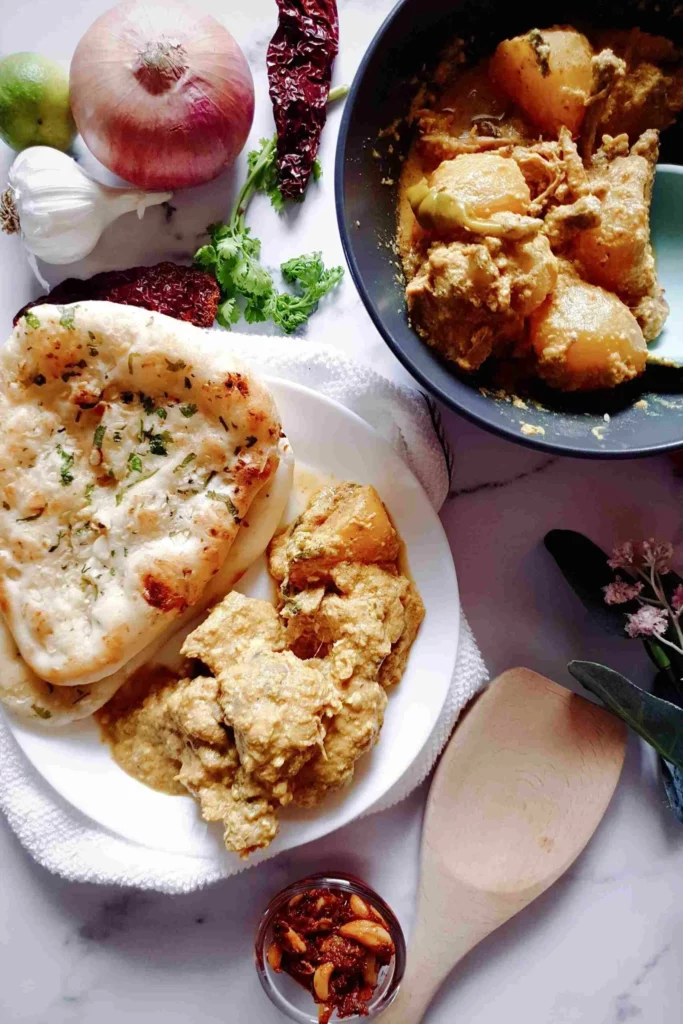
- Chicken korma tastes divine with some naan (my favorite being butter garlic naan!). It goes well with roti, phulka, chapati, rumali roti or any soft Indian flatbread too.
- If your curry is on the thinner side, you can serve it alongside some thick bread. That’s why naan goes really well with it like I mentioned above because naan is on the thicker side too so it soaks up all that rich goodness. You can try having your chicken and potatoes korma with some thick bread, soak in that bread nice and good in the chicken korma curry and enjoy all those flavors. Thick bread works well with a thicker chicken korma curry too!
- If you don’t have anything around to pair this delicious curry with, you can go ahead and have it on its own too. Enjoy it like you would enjoy a warm hearty soup or stew.
- Whether you choose to have your chicken korma curry with rice, naan, cauliflower rice, any other Indian flatbread or a different grain, I want you to know that chicken korma goes really well alongside some Indian garlic pickle (also called “achaar” in India). Try having a very tiny bit with each bite! There are different kinds of Indian pickles out there but garlic pickle goes really well here in my opinion. I’m sure you’ll be able to find a jar of garlic Indian pickle in your local Indian grocery store. You can fry up some papadams on the side. You can also toast some almonds and cashew nuts and add them on top of the chicken korma as a finishing touch.
- No matter what you’re serving your chicken korma curry with, please serve it with some freshly chopped onions! Onions taste wonderful alongside Indian food. Just take tiny onion bites in between bites of chicken korma and oh my goodness it’s amazing ❤!
When it comes to me, I love serving my chicken korma curry in a bowl with some Basmati rice in a plate and butter garlic naan in another plate along with some garlic pickle and chopped onions on the side.
I adore korma with rice AND naan both. I can’t choose! So I just find it best to have my chicken korma curry in a separate bowl so I can dip my naan into it or pour some over my rice. Makes things so much easier!
Let me know how you enjoy your chicken korma in the comments section below. I would love to hear all about it 😊!
Frequently Asked Questions (FAQs)
What does Indian korma curry taste like?
Indian korma curry is delicious! It isn’t spicy or filled with different Indian spices like some other classic Indian curries. Korma is more mellow in its taste.
There are lots of background flavors.
There’s a characteristic fried onion taste along with creaminess from the yogurt and cream.
You can taste that delicious nuttiness from the almond paste too.
The curry is also very slightly tangy because of the lemon juice added towards the end.
Also, the chicken in korma is succulent and flavorful because it’s braised in yogurt and cooked with some other incredibly delicious ingredients.
This is one of the best chicken curries ever ✨.
What is the difference between korma and kurma?
Very simply put, Korma is cooked in the northern part of India. It is cooked using yogurt which is the main ingredient here. The base of the curry when cooking korma is yogurt along with a nut paste.
Kurma on the other hand, is cooked in the southern part of India. It is usually cooked using coconut. Yogurt may also be used in this dish but one of the main differing ingredients is coconut.
There may also be a bit of difference in some other ingredients and cooking methods when making both these dishes too.
What is korma sauce made of?
Traditionally, the main ingredients used to make a korma curry are yogurt, nut paste and browned onion paste.
Other ingredients added to this curry may vary from one korma recipe to the other but the base of the sauce is usually made using yogurt, nut paste and browned onion paste.
Some recipes may use different ingredients to make the base of their korma curry itself though. That’s because this recipe has evolved so much over hundreds of years and today, differs from country to country and even from family to family!
Does chicken korma have nuts? Should korma have coconut?
Yes, chicken korma traditionally does have nuts.
Almond nut paste is usually used to make korma.
Cashew nut paste may also be used to make a chicken korma with cashews.
Korma does not need to have coconut but some recipes may add coconut to the korma curry as well.
Coconut may be added to the korma curry along with another nut paste or on its own.
Coconut is also a great option for a nut-free korma if you aren’t allergic to it.
What to serve with chicken korma?
Chicken korma tastes incredible served along with some steamed Basmati rice, Indian garlic pickle and papadams.
It tastes absolutely divine with some butter garlic naan too!
For more suggestions, check out our Serving Suggestions section above.
Is chicken shahi korma and regular chicken korma spicy?
No, chicken shahi korma and regular chicken korma are usually not spicy.
But once again, this varies from country to country and region to region.
Our shahi chicken korma recipe here is not spicy at all!
What is the difference between chicken shahi korma and butter chicken?
Pretty interesting question!
Both these recipes are absolutely scrumptious in their own special way and there are quite a few major differences between them.
One of the main differences is that the base of chicken shahi korma is yogurt and the base of butter chicken is tomatoes.
These are the factors that make a curry a korma:
- The meat is cooked in yogurt until it’s tender, succulent and delicious. Yogurt is the main base for a korma.
- Another main ingredient is browned onion paste.
- And one more incredibly important ingredient is nut paste.
- To make a chicken korma a shahi chicken korma, cream is added to it and some cottage cheese may also be added towards the end.
- Tomatoes are NOT added to a korma. This is not a tomato-based curry and the slight tanginess in a korma comes from yogurt and not tomatoes. The recipe given here also is korma without tomatoes.
These are the factors that make a curry a butter chicken:
- This is a tomato-based curry.
- Quite a few more spices are added when making butter chicken.
- There’s lots of dairy involved in butter chicken. Butter, cream and yogurt are added in scrumptious abundance!
- The chicken is usually cooked beforehand. Tandoori chicken is traditionally used but in modern kitchens today (because not all of us have tandoors at home), the chicken is baked, grilled or pan-fried before adding it to the buttery tomato gravy.
You can check out our Dreamy Creamy One Pot Mouthwatering Butter Chicken Curry recipe for our take on this gorgeous buttery chicken curry.
What can make korma runny/watery?
A watery curry is one of the worst things ever!
Korma can be made a little too watery by adding in too much water and not allowing it to mix in with the gravy and cook for a little while until it reaches your desired consistency.
So many people just add water to the curry until it reaches their desired consistency and then serve the curry just like that. That’s not the right way, guys!
Here are a few tips you can follow to make sure your korma (or any other curry) is never ever watery, ever:
- Try and pour in warm water when you’re adding in water to the curry.
- Add in a little more water than the consistency you desire. Raise the heat and bring your curry to a boil. Let it boil for about two minutes. Then reduce the heat to low to medium-low and let your curry simmer for a few minutes until it is just a little thinner than your desired consistency. That’s because korma thickens in consistency as it cools down so always keep it just a little thinner than you prefer.
What can make korma too sweet or spicy?
I hadn’t ever heard of korma being sweet until I had a British friend recently tell me how she’s only ever eaten sweet-ish korma and I was like wait, what?
The concept of korma being sweet is something new to us here at The Buttery Fairytale.
The korma that is famous in most regions in India is a rich smooth creamy curry which isn’t very spicy but in no way is it sweet either.
The sweetness (if you can call it that) may come from the browned onion paste. But it’s still not enough to call korma a sweet curry.
Sometimes, some restaurants may garnish their korma with raisins so that may lend some sweetness too.
My British friend told me how some restaurants add sugar to the korma where she comes from to make the korma curry sweet and so, I guess adding in too much sugar can make korma sweet.
Don’t add sugar to this particular recipe of chicken korma, guys!
I like curries that are on the sweeter side but the chicken korma recipe I’ve given here tastes best without sugar. This is a sugar-free korma recipe.
Coming to spiciness, korma can get too spicy if you add in either too much red chili powder or green chilies or both.
I’ve used Kashmiri red chili powder here which is not very spicy at all but I’m not taking any chances by adding too much. Just stick to the amount I’ve asked you to put in and it won’t be spicy at all ❤.
Also, follow my method of cutting your green chili peppers lengthwise into half and removing all their seeds. These little guys can be super spicy if they are chewed on accidentally.
You can also remove those green chili peppers before serving the dish! Remember to use only the amount of chilies I’ve asked you to use to keep this dish less hot.
Can I cook this rich and aromatic Indian chicken korma curry recipe in advance? How do I store it?
Yes, you can!
Just go ahead and cook your chicken korma curry as given in this recipe, allow it to completely cool and then store it in an air-tight container in the fridge for 2 to 3 days.
Curry tastes even better with time. That’s because the flavors have more time to work together resulting in an even more amazing korma curry!
How to reheat chicken korma?
This delicious, rich and aromatic Indian chicken korma curry cooked in yogurt reheats pretty well.
Korma may thicken up as it cools.
To heat it, you need to keep a cooking pan ready.
Add your chicken korma to it.
Then, pour in some warm water. Add a little more water than your desired consistency.
Raise the heat, stir the curry and bring it to a boil for a minute or two.
Then reduce the heat and let it simmer until it is just a little thinner than your desired consistency (because it may thicken as it cools) and is completely heated through.
If you’re in hurry though, you can heat this chicken korma curry in the microwave too and it’ll still be incredibly delish!
Can I make this rich and aromatic Indian chicken korma curry cooked in yogurt according to my diet preference?
Yes, you can make this korma recipe according to your diet preference!
Explore the Variations Section above to see our suggestions on how you can make vegetarian korma, dairy-free chicken korma, gluten-free chicken korma, nut-free chicken korma or vegan korma.
How to prevent my yogurt from curdling in the korma curry?
A sure way to know if the yogurt curdled in your korma curry is if your curry looks grainy and has little white bits floating in it.
This doesn’t affect the taste of the curry much but some people may not like how the curry looks with curdled yogurt in it so you can follow these steps to reduce the chances of your yogurt curdling in the curry:
- Use full-fat plain yogurt if you can. That’s because it has lower chances of curdling.
- Please wait for the plain yogurt to come to room temperature. Make sure it’s not really really cold and fresh out of the fridge when it’s time to add it to the pan.
- Whisk the yogurt really well to reduce the chances of it curdling when it’s added to the pan.
- Take a teaspoon of the hot onion ginger-garlic mixture (when you’re making this recipe) from the pan. Then, slowly add it to the plain yogurt while stirring gently simultaneously and mix it really well to get the yogurt to that temperature. Add in about 4 to 5 more teaspoons of the curry if you can and stir it into the yogurt.
- Always reduce the heat completely to low or move your pan away from the heat altogether if you can. This reduces the temperature of the curry which then in turn reduces the likelihood of the plain yogurt curdling in the curry.
- You can also add a teaspoon of cornstarch to the yogurt but I don’t prefer doing this. Use this as a last resort step if you find the yogurt curdling in your curry every single time even after following the tips above.
You can follow either or all of the above tips to drastically reduce the chances of your plain yogurt curdling in your curry once it’s added to the pan.
It’s always best to follow all the tips (except the last tip) every single time to prevent curdling from happening as much as possible!
❤❤❤
Hey you, I really hope you love this rich and aromatic Indian chicken korma curry cooked in yogurt recipe as much as I do!
If you do, I would appreciate a star rating SO much (you can rate this recipe right below or from the Recipe Card 💖).
You have no idea how happy it’ll make me and how much of a boost it gives us here. It’s the best feeling ever when you see someone appreciate something you’re passionate about.
Please also let me know in the comments below if you’ve tried this recipe and loved it or have any suggestions regarding it. I would love to hear all about it!
I hope you make the best memories ever with this recipe and all the recipes here on The Buttery Fairytale ✨.
We would love to get to know you better, say hello in the comments below ❤
Don’t forget to Subscribe to our Newsletter for more personalized conversations and exclusive interactions.
Also, keep in touch and follow us on Pinterest, Instagram and Facebook!
If you make this recipe, please post a picture of it and tag me on Pinterest or Instagram @thebutteryfairytale. You can also hashtag it with #thebutteryfairytale. I LOVE seeing your recipe creations and seeing you create our recipes is… the best feeling in the whole world! 😊💖
Would you like to explore more such recipes? Check out our collection of absolutely lip-smacking Curries, Stovetop and Fall recipes.

RICH & AROMATIC Indian Chicken Korma Curry (Cooked in Yogurt)
Ingredients
- 1½ tbsp neutral cooking oil
- 1 medium-sized or 180 gms onion made into a paste by grinding and blending it with 1 tsp water
- 1½ tbsp ginger-garlic paste store-bought or grind 5–6 medium-sized peeled garlic cloves and 2 inches of ginger with 1/2 tsp water to make your own paste
- 1 lb or 454 gms bone-in chicken skinless, cut into medium-sized pieces
- ½ lb or 250 gms potatoes peeled and cut into 2 inch cubes
- ½ tsp Kashmiri red chili powder
- ½ tsp ground turmeric
- 1 tsp salt or according to your preference
- 1 oz or 30 gms almonds made into a smooth paste by grinding them with 1 tbsp of water (can substitute with cashew nuts)
- 3 tbsp heavy cream or light cream
- ¾ cup or 200 gms plain yogurt needs to be at room temperature (can substitute with Greek yogurt but it is more prone to curdling)
- 1¼ cups or 300 ml water
- fresh cilantro leaves plucked from 2 sprigs
- fresh mint leaves leaves plucked from 1 sprig
- 2 whole green chili peppers sliced lengthwise in half and deseeded
- ½ tsp garam masala powder
- 1 tbsp lemon juice (can substitute with lime juice)
( Note- Please keep in mind that I go into lots of detail in all my recipes so you get to know all the super important tips & tricks when it comes to making a particular recipe. I always want you to make the BEST of whatever you’re cooking ❤ )
Instructions
- GET ALL YOUR KORMA INGREDIENTS READYOur chicken korma curry doesn’t have lots of ingredients so yay! But hey, some prep is necessary.Go ahead and get all the ingredients ready, the plain yogurt needs to be at room temperature so make sure to take it out from the fridge if needed.Also, make your onion paste (made with grinding and blending 1 medium-sized or 180 gms onion with 1 tsp water), 1½ tbsp ginger-garlic paste (see ingredients list) and almond paste (made with grinding 1 oz or 30 gms almonds with 1 tbsp of water).Keeping all the ingredients ready here will help you add each ingredient on time and this way, you won’t feel flustered while cooking. It’s pretty awesomesauce how just a little prep beforehand makes the whole cooking process super smooth.Now that that’s out of the way and all your ingredients are ready, let’s cook this scrumptious rich creamy chicken and potatoes curry 💖!
- COOK THE ONION PASTEI’ve used a kadai here. A kadai can be described as the Indian version of a wok.You can use a heavy-bottomed pan or a Dutch oven too. Please make sure the cooking pan you’re using has a lid though.So yes…Onions are pretty important in most curries and they're super important in this chicken korma curry.They're the main guys even more so in chicken korma because one of the most important ingredients in a korma is browned onion paste. That browned onion paste gives chicken korma its characteristic deep rich taste.So let’s go brown some onion paste!Pour in 1½ tbsp neutral cooking oil in your cooking pan and heat it over medium-low heat.Once the oil is heated through in a few minutes, add your smooth onion paste to it.Now, over low to medium-low heat, cook your onion paste until it turns a deep golden brown.This may take about 20 to 25 minutes. I know that sounds like quite a lot of time but this is an incredibly important step in this dish and it does so much for our korma curry so patience is key here ❤.Also, please don’t increase your heat to high to speed up the process because that'll lead to only a few parts of the onion paste turning brown and the rest of it remaining raw. The onion paste may also burn. It literally takes a few seconds for onions to go from slightly browned to burnt. So yep, please keep a constant check on the onion paste.As the onion paste starts to brown up, it may start to stick a little to the bottom of your pan but that’s perfectly fine. It'll come off during the rest of the cooking process.You may also smell that characteristic aroma of delicious browned onions once the onion paste is browned well. This means your browned onion paste is almost done!Please keep in mind that the cooking time will depend on the amount of onion paste you’re using, the cooking utensil you’re using, the size of your cooking utensil and your stove, so please keep a constant check on your onion paste while cooking it. Don’t let it brown too much or it may burn.
- ADD THE GINGER-GARLIC PASTEOnce your onion paste turns that amazing deep golden brown color, add in the 1½ tbsp ginger-garlic paste.Sauté for about 2 minutes until the ginger-garlic paste mixes really well with the browned onion paste.
- COOK THE CHICKEN AND POTATOESAdd ½ tsp Kashmiri red chili powder, ½ tsp ground turmeric, ½ lb or 250 gms potatoes, 1 lb or 454 gms bone-in chicken and 1 tsp salt to the onion and ginger-garlic mixture. Toss the chicken and potatoes with all the spices and the onion ginger-garlic mixture. Mix everything really well together.Make sure the chicken and potatoes are coated well with all those onions, ginger, garlic and spices.Here comes the important part. You need to cook the chicken really well and mix it in with everything in the pan. This is an essential process in cooking Indian food called bhunna which basically means to “roast”.Keep mixing, tossing and cooking the chicken with all the other ingredients in the cooking pan. Do this for about 7 to 8 minutes.Let all those amazing flavors work with each other. Go ahead and breathe in all those delicious gingery garlicky oniony chickeny aromas in the process ✨!
- ADD THE ALMOND PASTEOnce you've cooked your chicken really well for about 7 to 8 minutes, go ahead and add the previously made almond paste to the pan.Now, mix the almond paste really well with the chicken and all the other ingredients. Sauté for a good 5 to 6 minutes.When you’re doing this, you’re cooking that almond paste and allowing it to mix with all the other ingredients and gently lend its flavors to them.All these processes are incredibly important for our chicken and potatoes korma.The extra time we cook each ingredient and allow it to mix with everything else in the pan is essential. This is what will turn a normal ok-tasting curry into an absolutely amazing delicious curry ❤.
- ADD THE CREAM AND PLAIN YOGURTThere are some really important tips in this step to prevent your plain yogurt from curdling in the curry so please keep reading before adding in the cream and plain yogurt to the pan. Please move your pan away from the heat for this step if you can.Set the pan aside for a minute or two and then follow the instructions below.If you really can’t move the pan away from the heat though, then reduce the heat to low.Now…Follow the steps below to prevent your plain yogurt from curdling in the curry. These steps can be followed if you’re afraid of your light cream/heavy cream curdling too:1) Use full-fat plain yogurt if you can. That’s because the chances of it curdling are lower.2) Wait for the plain yogurt to come to room temperature. Make sure it’s not fresh out of the fridge and super cold when it’s time to add it to the pan.3) Whisk the plain yogurt really well to reduce the chances of it curdling when it’s added to the pan.4) Take a teaspoon of the hot onion ginger-garlic mixture from the pan. Then, slowly add it to the plain yogurt while stirring it gently simultaneously and mix it really well to get the yogurt to that temperature. Add in about 4 to 5 more teaspoons of the curry if you can and stir it into the yogurt.5) Always reduce the heat completely to low or move your pan away from the heat altogether and let it rest for a minute or two before adding in the plain yogurt. This cools down our curry which then in turn reduces the likelihood of the plain yogurt curdling in it.6) If you are afraid of the cream curdling in the curry, go ahead and add it to the plain yogurt and whisk them together. Then, follow the tips above to reduce the chances of the cream and plain yogurt curdling.7) You can also add a teaspoon of cornstarch to the yogurt BUT I don’t really prefer doing this. Save it as a last resort in case your plain yogurt curdles every single time even after following all the tips above.You can follow either or all of the above tips to drastically reduce the chances of your plain yogurt curdling in the curry once it’s added to the pan.It’s always best to follow all the tips above to prevent curdling from happening as much as possible (except for the last cornstarch tip, that is if everything else fails)!You can follow these tips for the light cream/heavy cream too if you’re adding it separately here or in any other dish!These tips will also work when you're cooking any other curry and need to add plain yogurt to it.So yes, I hope these tips help you guys every single time you add plain yogurt to a dish!Now…Once you’ve followed the tips above, go ahead and add ¾ cup or 200 gms plain yogurt and 3 tbsp heavy cream or light cream to the pan! That sudden richness and creaminess taking over everything in the pan once you add in the cream and plain yogurt is so beautiful to watch happening 😍.Gently mix the chicken, potatoes and everything else in the pan together with the cream and plain yogurt.Now, increase the heat to medium-low and cook for 3 to 4 minutes until everything comes to a light simmer.
- COVER AND COOKOnce you’re done cooking everything in the pan for 3 to 4 minutes until it all comes to a light simmer, pour in 1¼ cups or 300 ml water to the cooking pan.Gently stir and mix everything together. Now, completely submerge your potatoes in the water. Cover the pan and cook your curry on low to medium-low heat for about 28 to 30 minutes.Once again, the cooking time will depend on the number of people you’re cooking for (in case you’re cooking for more servings than the recipe originally has been made for i.e. 4 servings), the cooking utensil you’re using, the size of your cooking utensil and your stove. Please keep checking on your curry periodically while it cooks. Make sure it doesn’t dry out too much.
- CHECK HOW THE CURRY IS DOING 😉Once those 30 minutes are up (I hope you guys were checking on your curry from time to time like I asked you to above, we don’t want any strange-looking curry surprises!), gently lift the lid up (be careful) and see how your curry looks.The oil may have risen to the top of your curry by now and that’s good. It means everything is cooked through so YAY 💃🏻!Some important points to keep in mind here… Once you lift your lid up, the first thing I want you to see is how your potatoes are doing.Gently insert a fork into one of the potato cubes. If you're able to do this without any difficulty, your potatoes are cooked through and ready.If there is some resistance and your potatoes are still a little tough, cover and cook for another 5 minutes.Once you've made sure your potatoes are cooked through, it's time to check on the curry. You may notice your curry is either too runny, too thick or just right.When it comes to me, my tried and tested way and preferred consistency comes in usually when I do this- Evaporate the curry on high heat for another 3 to 4 minutes without the lid on.And then reduce the heat to low, taste it and add in some more salt if I prefer and that's it. Move to the next step.The curry may still look a little thin but it will continue to evaporate as we cook it in the next step too. I suggest you guys follow my method if you're cooking this dish for the first time ever. That's because it's a safe bet and will help you understand if you prefer a thinner or thicker consistency the next time you cook this dish.But you can also see what you relate to most from the following:1) If you feel the consistency of your curry is just right, gently taste your curry (be careful ❤) and if you feel it needs more salt, add some in according to your preference and then jump to the next step.2) If you feel your curry is too runny, raise the heat to high and let it evaporate to being just a little thinner than your desired level. Please be careful and don’t evaporate too much of your curry. That’s because the curry will continue to evaporate and thicken up as it cooks in the next step. It will also thicken up as it cools down once it's served. Then, reduce the heat to low, taste the curry, adjust the salt if you prefer and move to the next step.3) If you would like a thinner curry, just go ahead and add a little more water than how thin you prefer your curry to be. Mix it in well. Increase the heat to high and bring your curry to a boil. Let it boil for a minute or two. Then, reduce the heat to low once again and let it simmer for at least a minute or two or until it reaches a stage that is just a little thinner than your desired consistency. That’s because the curry will keep evaporating in the next step. It will also thicken up as it cools down once it's served. Give it a taste. It may need a little more salt because you’ve added more water to it. If it does, add some salt according to your taste and move to the next step.
- SOME FINISHING TOUCHES!Add in ½ tsp garam masala powder, 2 whole green chili peppers, fresh cilantro and fresh mint leaves to your chicken curry. Still keeping the heat low, cover your pan with the lid once again and let the curry cook for another 2 minutes.Once 2 minutes are up, lift the lid, switch off the heat and add in 1 tbsp lemon juice.And it’s done ✨!Your incredibly delicious, rich and aromatic Indian chicken korma curry cooked in yogurt is ready! And YOU made this happen. All on your own. You should be incredibly proud of yourself for making such a scrumptious curry with so many steps and things to keep in mind ❤.Check out the Serving Suggestions above to find your preferred way of eating this curry and hey, don’t forget to eat using your bare hands, the traditional way!
Notes ✍🏼
- Always make sure your spice powders are fresh. Spice powders don’t go bad but lose their potency over time!
- Get all your ingredients ready before cooking. It’s super important to do this before cooking any recipe out there and especially even more so when cooking a curry. That’s because there may be ingredients to add in just at the right time and if you don’t have all the ingredients ready, you may get overwhelmed while cooking.
- This dish should not be cooked in a hurry. Make sure you have enough time on your hands when you decide to make this chicken korma recipe. It doesn’t take really long to cook but you need to dedicate the given time to each step as given in the instructions. Please don’t jump through any steps because these small things make a huuuge difference and will give you the best curry ever!
- Make sure your onions are ground to a really fine paste. In a korma, you are not supposed to see long slices of onions floating in the curry. If you choose to not grind your onions to a paste, the curry will still taste pretty good but it won’t be authentic chicken korma and it’ll lack that delish yum taste that comes from browned onion paste.
- Please make sure you brown the onion paste really well. That fried browned onion taste is incredibly delicious and does so much for the curry ❤!
- If you’re making your ginger-garlic paste at home, always make sure you use more garlic in the paste than ginger. Ginger shouldn’t be the dominating one here. The perfect ginger-garlic paste is where garlic dominates the taste and ginger is in the background, chilling. Unless YOU prefer more ginger, of course!
- As I mentioned in the instructions, bhunna (roasting) the chicken is incredibly important. Please don’t skip out on this step (or any other step, really). These small tips have been going on for generations and for good reason because they make all the difference ❤!
- If you want a darker golden/yellow dish, add a little more turmeric to your curry. Don’t add too much though because it will change the taste of the curry. And if you want a redder dish, add more Kashmiri chili powder. Once again, don’t add too much because it will change the taste of your curry.
- Korma curry thickens up as it cools down. Please keep this in mind when you are choosing your desired consistency because korma will always get thicker than the consistency you prefer.
- If you prefer a thinner curry, add in more water in Step 8 and make sure you season accordingly with salt. Read more about how to go about this in Step 8.
- You may also prefer a drier version of the chicken korma curry. For a drier curry, make sure you let more of the curry evaporate in Step 8. Read more about how to go about this in Step 8.
- Please be careful when slicing your green chili peppers! Try and do it as quickly as possible so it doesn’t stay in contact with your skin for really long. These chilies can make your skin and eyes burn if you don’t thoroughly wash your hands after you’re done slicing them. Green chili peppers are not fun when they burn but *sigh* they add such a good taste to our korma curry. If your hands happen to burn after slicing the green chili peppers, you can run them under some cold water or soothe them in some cold yogurt. This is not so common though and has happened to me just once ❤.
- To cut down on the heat from your green chili peppers, make sure you slice them lengthwise into half and deseed them as I ask you to do in this recipe. You can also remove the green chili peppers before serving the chicken korma, especially if you have kids. You can completely skip out on it too if you’re incredibly sensitive to spicy food but trust me, the curry isn’t spicy at all if you follow what I ask you to do with the green chili peppers!
- If you like spicy food, you can skip out on removing the seeds from your green chili peppers after slicing them lengthwise in half. You can also mince your green chili peppers or finely chop them for some extra heat. This can get really spicy though so be careful!
- Serve this dish immediately. If you are using an electric cooktop and not serving this dish immediately, move your cooking pan away from it and place it somewhere else because the electric cooktop may still be hot even after switching the heat off and the korma may continue to cook and thicken up.
- Go ahead and use boneless breast or thigh meat! I LOVE this dish with boneless breast meat. It makes it so much easier to eat too. Especially if you’re planning on having this dish the next day for lunch at work.
- You can also make this rich and aromatic Indian chicken korma curry cooked in yogurt using a different meat. It’s more commonly made with mutton. You can also try making shrimp korma, fish korma, lamb korma or even beef korma. Just adjust the cooking time according to the meat you use.
- Also, add in some different vegetables along with the potato! Almost every veggie goes well with the creamy goodness of this chicken korma curry. You can try adding in cauliflower, green beans, peas, carrots or any other vegetable that happens to be in season… Go ahead and experiment and find what you feel tastes best!
- Or hey, just skip out on the potatoes or any other vegetable for that matter and cook a super meaty korma if that’s something you prefer! I have my chicken korma that way sometimes. It’s only chicken chicken chicken 😍.
- There are two different kinds of pastes you can make out of your almonds- a smooth paste or a chunky paste. You can also maybe make something in the middle– a little smooth a little chunky. The smoother your paste is, the smoother your curry will be. When you’re cooking this dish for the first time, I suggest you go completely smooth with your almond paste.
- You can also try using a different nut such as cashew nuts instead of almonds. Chicken korma sooo good with cashew nuts too! Just make a paste with cashew nuts instead of almonds and cook the dish the same way according to the instructions given in this recipe to make chicken korma with cashew nuts. You can also experiment and make an almond-cashew nut paste for even more richness!
- We’ve used light cream in this recipe because chicken korma needs to be rich but not really heavy. But hey, you can use heavy cream to have a creamier and richer chicken korma curry.
- You can also go for a lighter cream or even half and half, if you prefer. Just keep a check on the amount of water you’re adding so the curry doesn’t get too watery in case you’re using half and half.
- For an even deeper chickeny taste, you can use chicken broth instead of water. I personally don’t use chicken broth because its flavors can be a little dominating. I prefer not letting any other flavor dominate over the gentle creamy, nutty, yogurty-ness of this delicious mildly spiced curry. But you can try it out and see if you prefer it!
- You may prefer a thinner curry. For a thinner version of this chicken korma curry, add in more water in Step 8 and make sure you season accordingly with salt. Read more on how to go about this in the same step.
- You may also prefer a drier version of curry. For a drier version of this chicken korma curry, make sure you let more of the curry evaporate in Step 8.
- This dish is not spicy at all. I’ve asked you guys to slice the green chili peppers lengthwise and discard their seeds to reduce as much heat as possible and to just get that slight flavor from the green chili peppers. As an extra added measure, go ahead and remove the green chili peppers from the chicken korma before serving the dish. Especially even more so if you have kids. If you are still incredibly against spiciness though, skip out on the green chili peppers altogether. I suggest against this though because deseeded green chili peppers really don’t make the dish spicy and add a fantastic subtle flavor to the chicken korma curry. I don’t want you to miss out on that!
- Traditionally and most commonly too, chicken korma is not supposed to be spicy. If YOU prefer spicy food though, go ahead and leave the seeds in when you slice your green chili peppers lengthwise. For a spicier chicken korma, chop or mince your green chili peppers. This will make the dish incredibly spicy though so be careful.
- This recipe is Chicken Shahi Korma (a royal version of the usual korma recipe out there) as we’ve mentioned before. To make it Shahi-er (royal-er), you can add in some chunks of cottage cheese in Step 8 once you lift the lid off the pan. Follow the rest of the steps as given but try and make sure the cottage cheese is cooked for at least 12 to 15 minutes before serving the korma so the cottage cheese is cooked through and is nice, cheesy and luscious.
- A different variation of this dish you can try is to add in some coconut milk instead of light cream/heavy cream. You can also add in coconut paste or shredded coconut instead of almond paste and make this a coconut chicken korma.
- Also, this dish is usually a very pretty pale yellow color and that’s what I prefer too. If you want a darker yellow chicken korma curry though, go ahead and add in a little more turmeric. Not too much though because it may alter the taste a little. If you want a redder chicken korma curry, add more Kashmiri chili powder. Once again, don’t add too much because it may change the taste of your curry a little.
Nutrition (per serving)
The nutritional information given here is only an estimate.
Please read our full Nutrition Information Disclaimer to learn more.Did you make this recipe?
I adore going through your creations! Tag us @thebutteryfairytale and hashtag it #thebutteryfairytale on Instagram.